Installing OTIS elevator parts in an existing building is a task that requires precision, deep understanding of OTIS’s proprietary systems, and adherence to strict safety protocols — and as a long-time supplier of genuine OTIS replacement parts, I’ve worked with dozens of building maintenance teams and independent elevator technicians to streamline this process over the years. Whether you’re replacing worn-out components in a small commercial elevator in a 1970s office building or upgrading control systems in a mid-rise residential complex, the goal is to ensure compatibility, reliability, and compliance with local elevator safety codes. Elevator Parts for OTIS

First, let’s start with the critical prep work. Before you even unbox a single part, you need to map the existing elevator’s layout and specifications. Many building managers overlook this step, which is why so many installations go wrong. OTIS elevates, even from the same model line, can have subtle differences based on their installation date, building load requirements, and regional code updates. For example, an OTIS Gen2 elevator installed in 2010 might use a different door motor connector than one installed in 2015, so using a generic “compatible” part instead of a genuine OTIS part can lead to connectivity issues or premature wear. As a supplier, I always recommend that customers pull the elevator’s original serial number — located on the control panel, car top, or in the equipment room’s manual — to cross-reference with our product catalog. This ensures you’re ordering the exact part that matches your unit, not a one-size-fits-all substitute.
Next, safety can’t be overstated. Elevator work is one of the most dangerous trades, so never skip lockout/tagout (LOTO) procedures. Before starting any work, shut off the main power supply to the elevator, test to confirm no electricity is running, and post warning signs at the elevator lobby and equipment room. For existing buildings, which often have high foot traffic, you might also need to barricade the elevator bay to prevent accidental entry. I’ve seen too many near-misses where a maintenance worker forgot to LOTO, or a tenant opened the elevator door mid-installation — these incidents are avoidable with basic safety steps, and they’re the number one reason insurance premiums for elevator projects spike.
Once you’re ready to remove old parts, take photos of every connection and placement before disconnecting anything. OTIS’s systems are designed with specific routing for wires, brackets, and hydraulic lines, and it’s easy to mix up a sensor wire or a mounting bolt when you’re in a hurry. For example, when replacing an OTIS hydraulic cylinder, snapping a photo of how the piston aligns with the guide shoes will save you hours of rework later. Also, label all wires with painter’s tape and a marker instead of assuming you’ll remember which terminal goes where. As a supplier, I often include a free label set with genuine OTIS parts for this exact reason — small tools that make a big difference in installation speed.
Now, let’s break down common part installations, since most projects focus on a few high-wear components. The first is door parts: door operators, hinges, rollers, and sensors. OTIS’s door systems are engineered for smooth, quiet operation, and replacing a worn door operator is one of the most impactful upgrades for an older elevator. When installing a new OTIS door operator in an existing building, you’ll need to adjust the door closing force and travel distance to match the car’s weight. Many technicians use generic settings, but OTIS’s systems have built-in adjustment points that are calibrated to the unit’s original load rating — deviating from these can cause doors to slam, which is a code violation and a safety hazard. As a supplier, we provide a printed calibration sheet with every door operator, specific to the model, so technicians don’t have to guess.
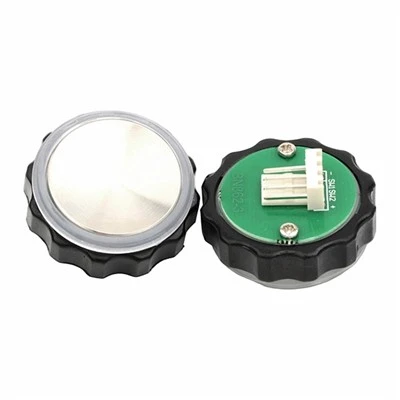
Another common replacement is control system parts, like the OTIS Elevator Control System (ECS) modules or call buttons. Older buildings often have analog control systems that can’t connect to modern building management systems, so upgrading to a digital OTIS module is a popular upgrade. When installing a control module, you’ll need to ensure it’s compatible with the existing wiring harness. If your building’s wires are frayed or outdated, it’s better to replace the harness at the same time — using a mismatched harness can cause the control module to fail, even if the part itself is brand new. I’ve had customers call me upset because a $500 control module stopped working a week after installation, only to find out they used a 10-year-old wiring harness that couldn’t support the new module’s power needs. That’s why as a supplier, we offer complimentary wiring harness inspections for customers ordering control parts — it’s a small service that prevents big headaches.
For hydraulic elevators, the most common part to replace is the valve assembly. Hydraulic valves control the flow of oil that moves the elevator car, and a faulty valve can cause the car to jerk or stall mid-travel. When installing a new OTIS hydraulic valve in an existing building, you’ll need to flush the old hydraulic oil before adding new oil. Residual oil with dirt or old additives can contaminate the new valve, leading to clogs or leaks. Most technicians skip this step, but it’s critical — I tell every customer that flushing the oil takes 30 minutes and extends the life of the new valve by years. We also include a bottle of OTIS-approved hydraulic oil with our valve assemblies, so you don’t have to source a generic oil that might not match your system.
Once the new parts are installed, testing is non-negotiable. Don’t just run the elevator once and call it a day. Test every function: door opening and closing at every floor, car positioning accuracy, emergency stop, and the alarm system. For OTIS elevators, many of these functions have specific test sequences in the manufacturer’s service manual. For example, when replacing a door sensor, you’ll need to run the “door safety test” to confirm the sensor detects a person or object in the doorway and stops the doors before closing. As a supplier, I always share a quick guide to these tests with every order — technicians don’t have to dig through the 200-page service manual to find the right steps, which saves time and ensures the test is done correctly.
Now, let’s talk about a mistake I see all too often: using non-Otis parts in an existing Otis elevator. Generic “compatible” parts might be cheaper upfront, but they often don’t fit the precise tolerances of Otis’s systems. For example, a generic door roller might be slightly thicker than an Otis roller, which can cause the door to bind over time and lead to expensive repairs. Otis’s parts are tested to meet their exact specifications, so even if a generic part looks the same, it won’t perform the same. I’ve had a customer save $200 on a generic control module, only to have the module fail 6 months later, resulting in $1,500 in emergency service calls and a replacement module. Choosing genuine Otis parts isn’t just about quality — it’s about long-term cost savings for your building.
Another key tip: document everything after installation. Take photos of the new parts, note the serial numbers, and save the calibration settings. This makes future repairs or replacements much easier, and it’s also helpful if you need to pass information to a new maintenance technician. I keep a folder with every customer’s part installation notes, so if they need to reorder a part a year later, I can pull the exact model and specifications in minutes.
At the end of the day, installing Otis parts in an existing building is about attention to detail and using the right components for your unit. Whether you’re a seasoned elevator technician or a building manager tackling a DIY project (always consult a professional for large-scale work), the key steps are: verify your elevator’s specifications, follow safety protocols, take photos before removing old parts, use genuine Otis parts, and test thoroughly.
If you’re planning an elevator part replacement or upgrade for your Otis unit, we’re here to help. Our team has years of experience working with existing buildings, and we can provide the exact parts you need, along with installation guidance and support to make your project go smoothly. Contact us to discuss your needs and get a custom quote for your Otis elevator parts requirements.
Elevator Parts for NBSL References
- OTIS Elevator Company. (2022). Existing Building Elevator Modernization: Installation Guidelines. Otis Worldwide Corporation.
- National Elevator Industry, Inc. (2021). Safety Standards for Elevator Part Installation in Existing Structures. NEII Technical Bulletin.
- Elevator World Magazine. (2023). Best Practices for Retrofit Elevator Components in Older Commercial Buildings. Industry Insights Report.
- Occupational Safety and Health Administration. (2020). Lockout/Tagout Procedures for Elevator Maintenance and Repair. OSHA Standard 1910.147.
- Otis Gen2 System Manual, 5th Edition. (2019). Proprietary Installation and Calibration Procedures for Existing Units.
Shaanxi Nona Elevator Parts Co., Ltd.
As one of the leading elevator parts for otis manufacturers and suppliers in China, we warmly welcome you to wholesale bulk elevator parts for otis in stock here from our factory. All elevator parts are with high quality and competitive price. For pricelist, contact us now.
Address: No.1502 Ronghao Building, Xi’an City, Shaanxi Province, China
E-mail: candice@nonaelevator.com
WebSite: https://www.nonaelevatorparts.com/
